1. Smart Contract
In the code examples so far, RenJS has been used to mint tokens directly to a user's account. In this tutorial, we'll instead mint to a smart contract, allowing more complex interactions to be made in a single step.
The contract will be very simple, allowing the user to mint tokens to the contract, and then withdraw them again. The contract itself will hold the minted ERC20.
To get started, create a new Hardhat repository:
mkdir tutorial-sol
cd tutorial-sol
yarn init --yes
yarn add --dev hardhat
yarn hardhat
Select Create a TypeScript project, and then press Enter for the remaining prompts. It will install some dependencies, which may take a few minutes.
Next, add Ren's contracts as a dependency:
yarn add @renproject/gateway-sol
Remove ./contracts/Lock.sol and instead create ./contracts/TutorialBridge.sol:
loading...
The contract will have two functions - a deposit function for minting renBTC, and a withdraw function for releasing renBTC back to Bitcoin. It will do this by calling the mint and burn functions on the BTC gateway contract.
Deposit function
The first function, deposit, we'll need to accept some additional parameters that are generated by RenVM, which will allow us to mint the renBTC. These parameters are:
amountrepresents the amount of BTC we are transferring into Ethereum,nHash(also known as the nonce hash) is used to uniquely identify a lock into Ethereum, andsigis a signature from RenVM to approve the mint.
In addition to these required parameters, the deposit function will also allow the user to attach a message to their deposit. In a real project, you would replace this with any number of parameters for doing more complicated contract interactions.
This is what the signature of the deposit function will look like:
loading...
There is another parameter we need to forward to the Gateway for minting: the pHash (also known as the payload hash). It is the hash of any extra parameters we are using (in our case this is the attached message). Inside the function body, add:
loading...
We can now get the address of the gateway and call mint.
loading...
Finally, we can log the message provided by the user:
loading...
The deposit function should now look like this:
loading...
The deposit function mints the
Withdraw function
The withdaw function is similar to the deposit function - we call burn on the Gateway contract, instead of calling mint.
The user will provide the message of the withdrawal (as before), a to Bitcoin address to receive the funds to, and the amount of BTC they want to withdraw.
loading...
Click to see full code for TutorialBridge.sol
loading...
Deploying to testnet
You'll need MetaMask (or another Web3 wallet) installed and the Görli network selected. Additionally, you'll need Görli ETH (gETH). Request some here: https://goerlifaucet.com/
To deploy the contract with MetaMask, we'll load it into remix.ethereum.org:
yarn add --dev @remix-project/remixd
yarn remixd -s . --remix-ide https://remix.ethereum.org
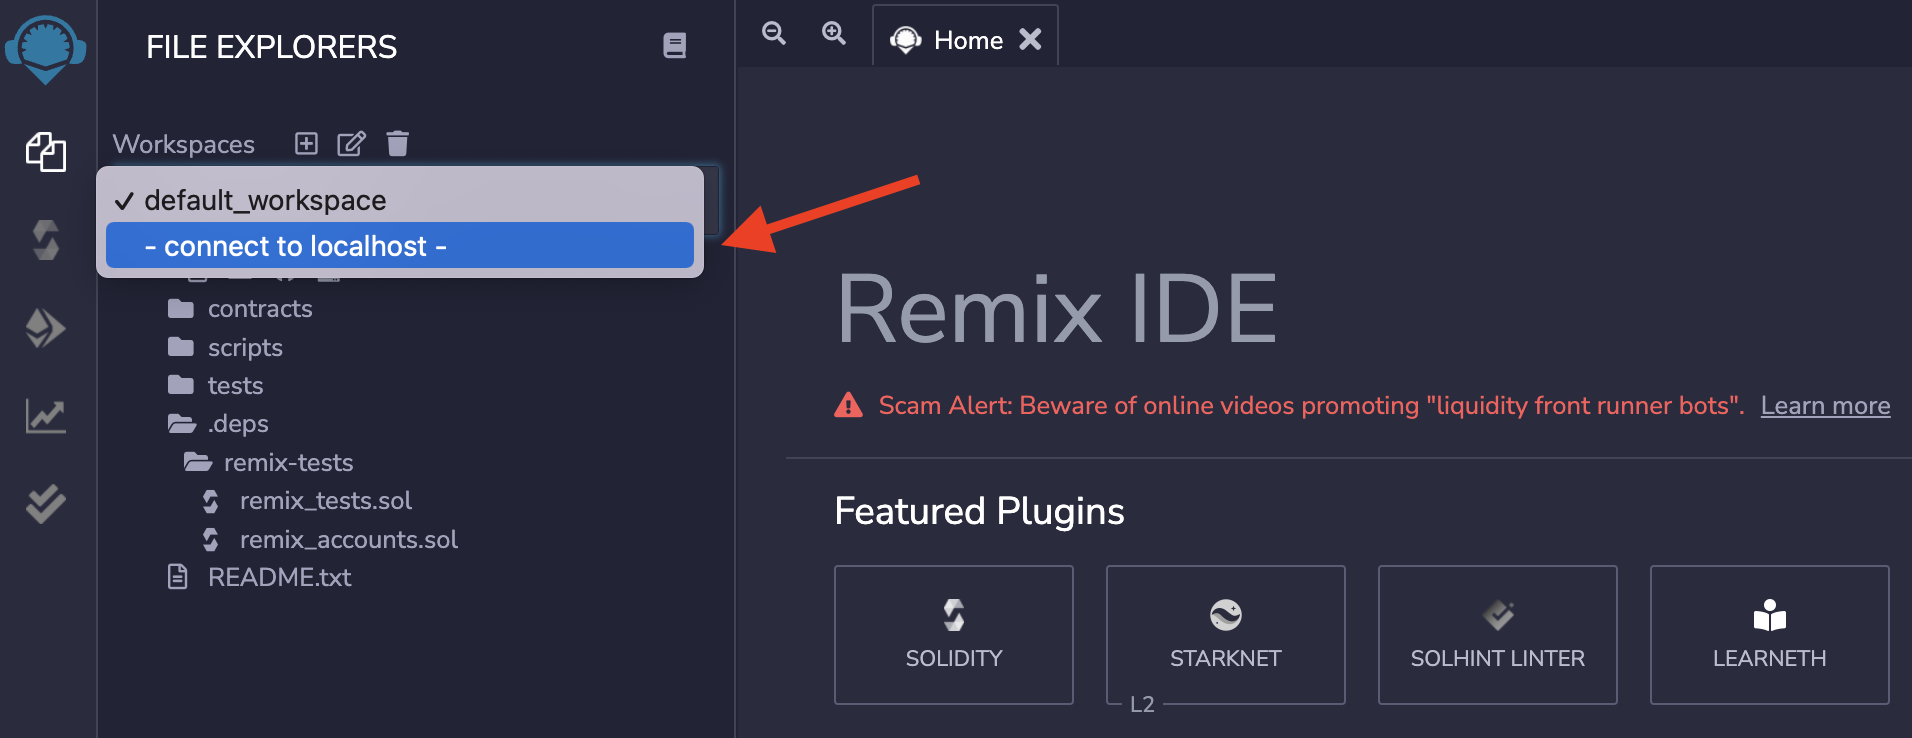
Now go to remix.ethereum.org, and connect to localhost:
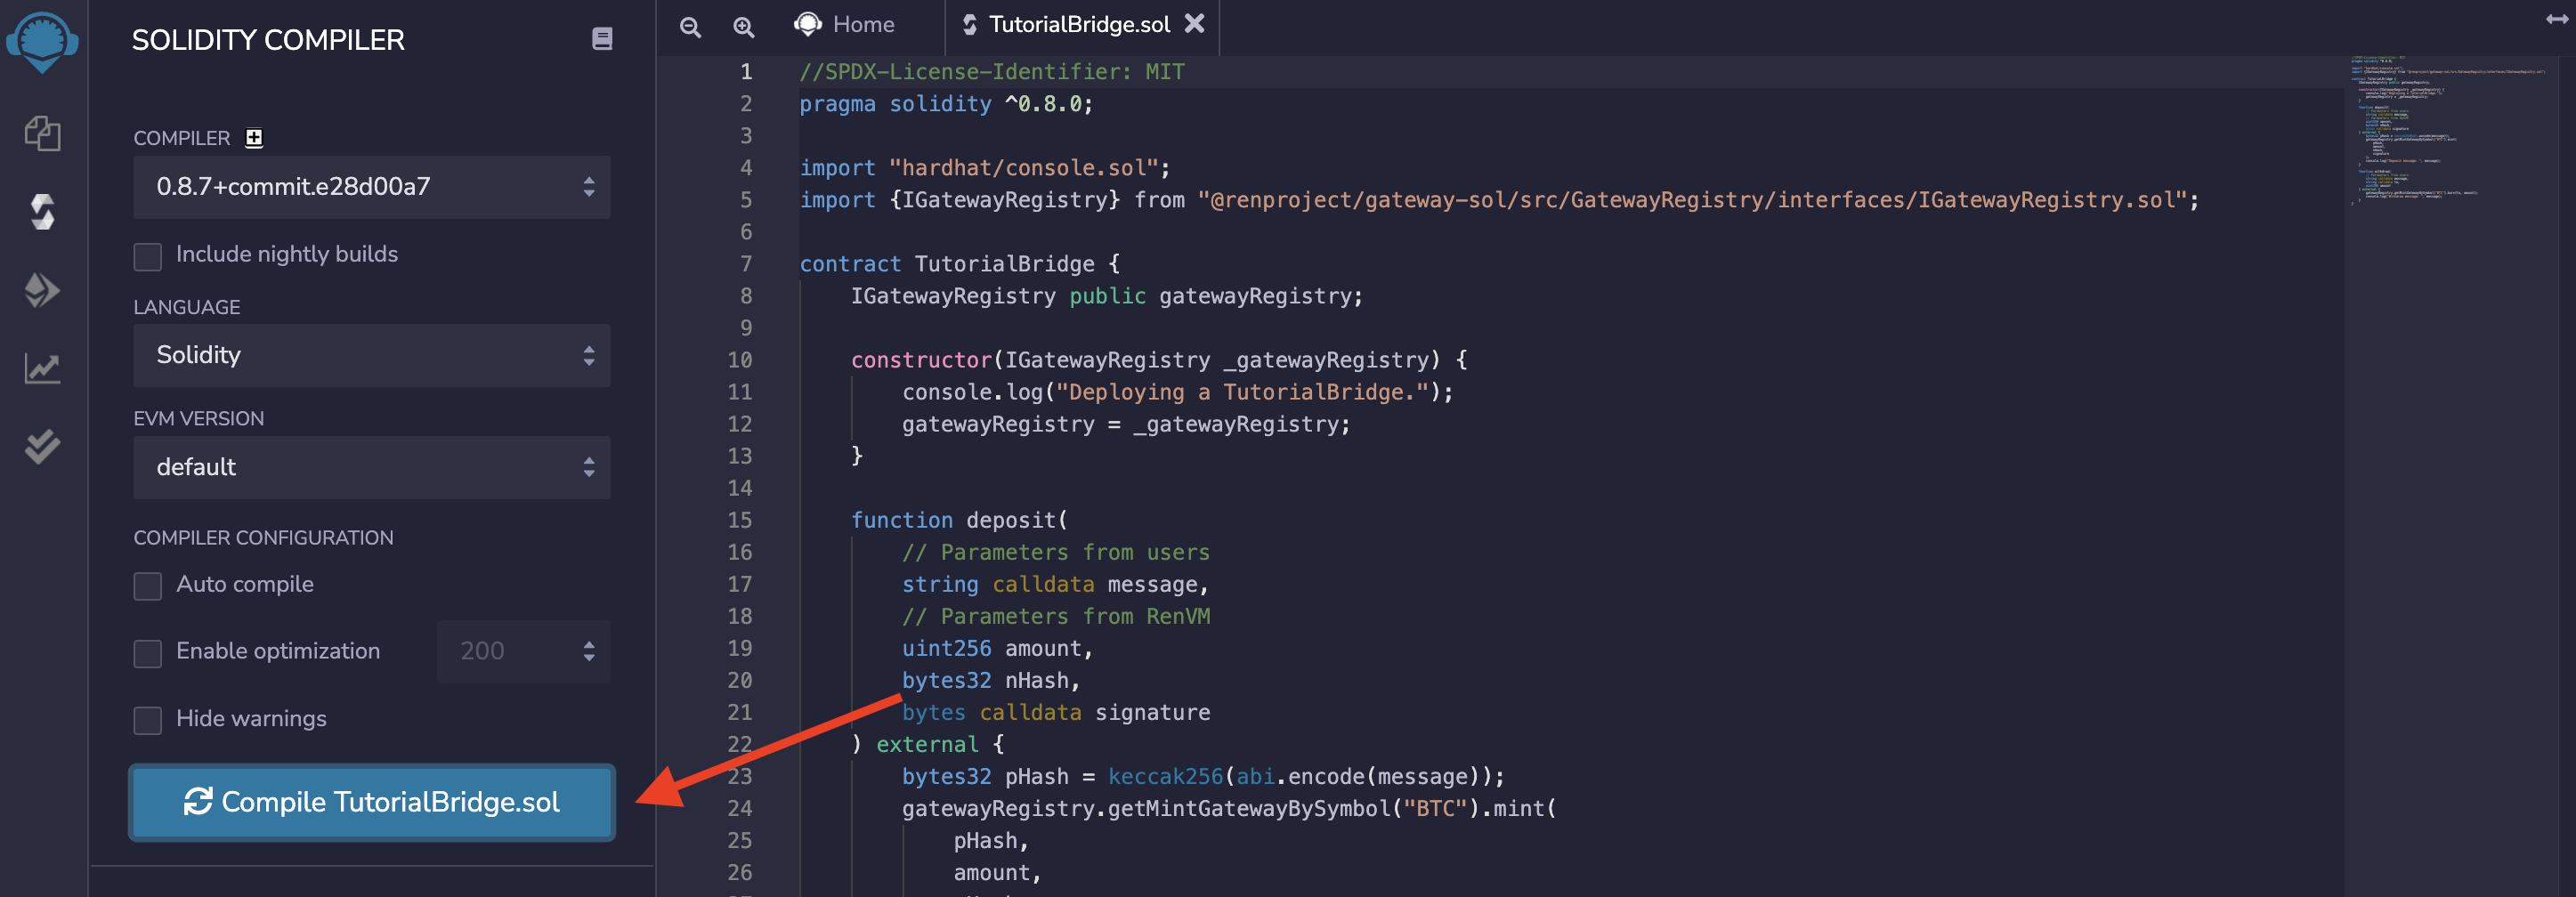
Select "contracts/TutorialBridge.sol" and then go to the "Solidity compiler" tab:
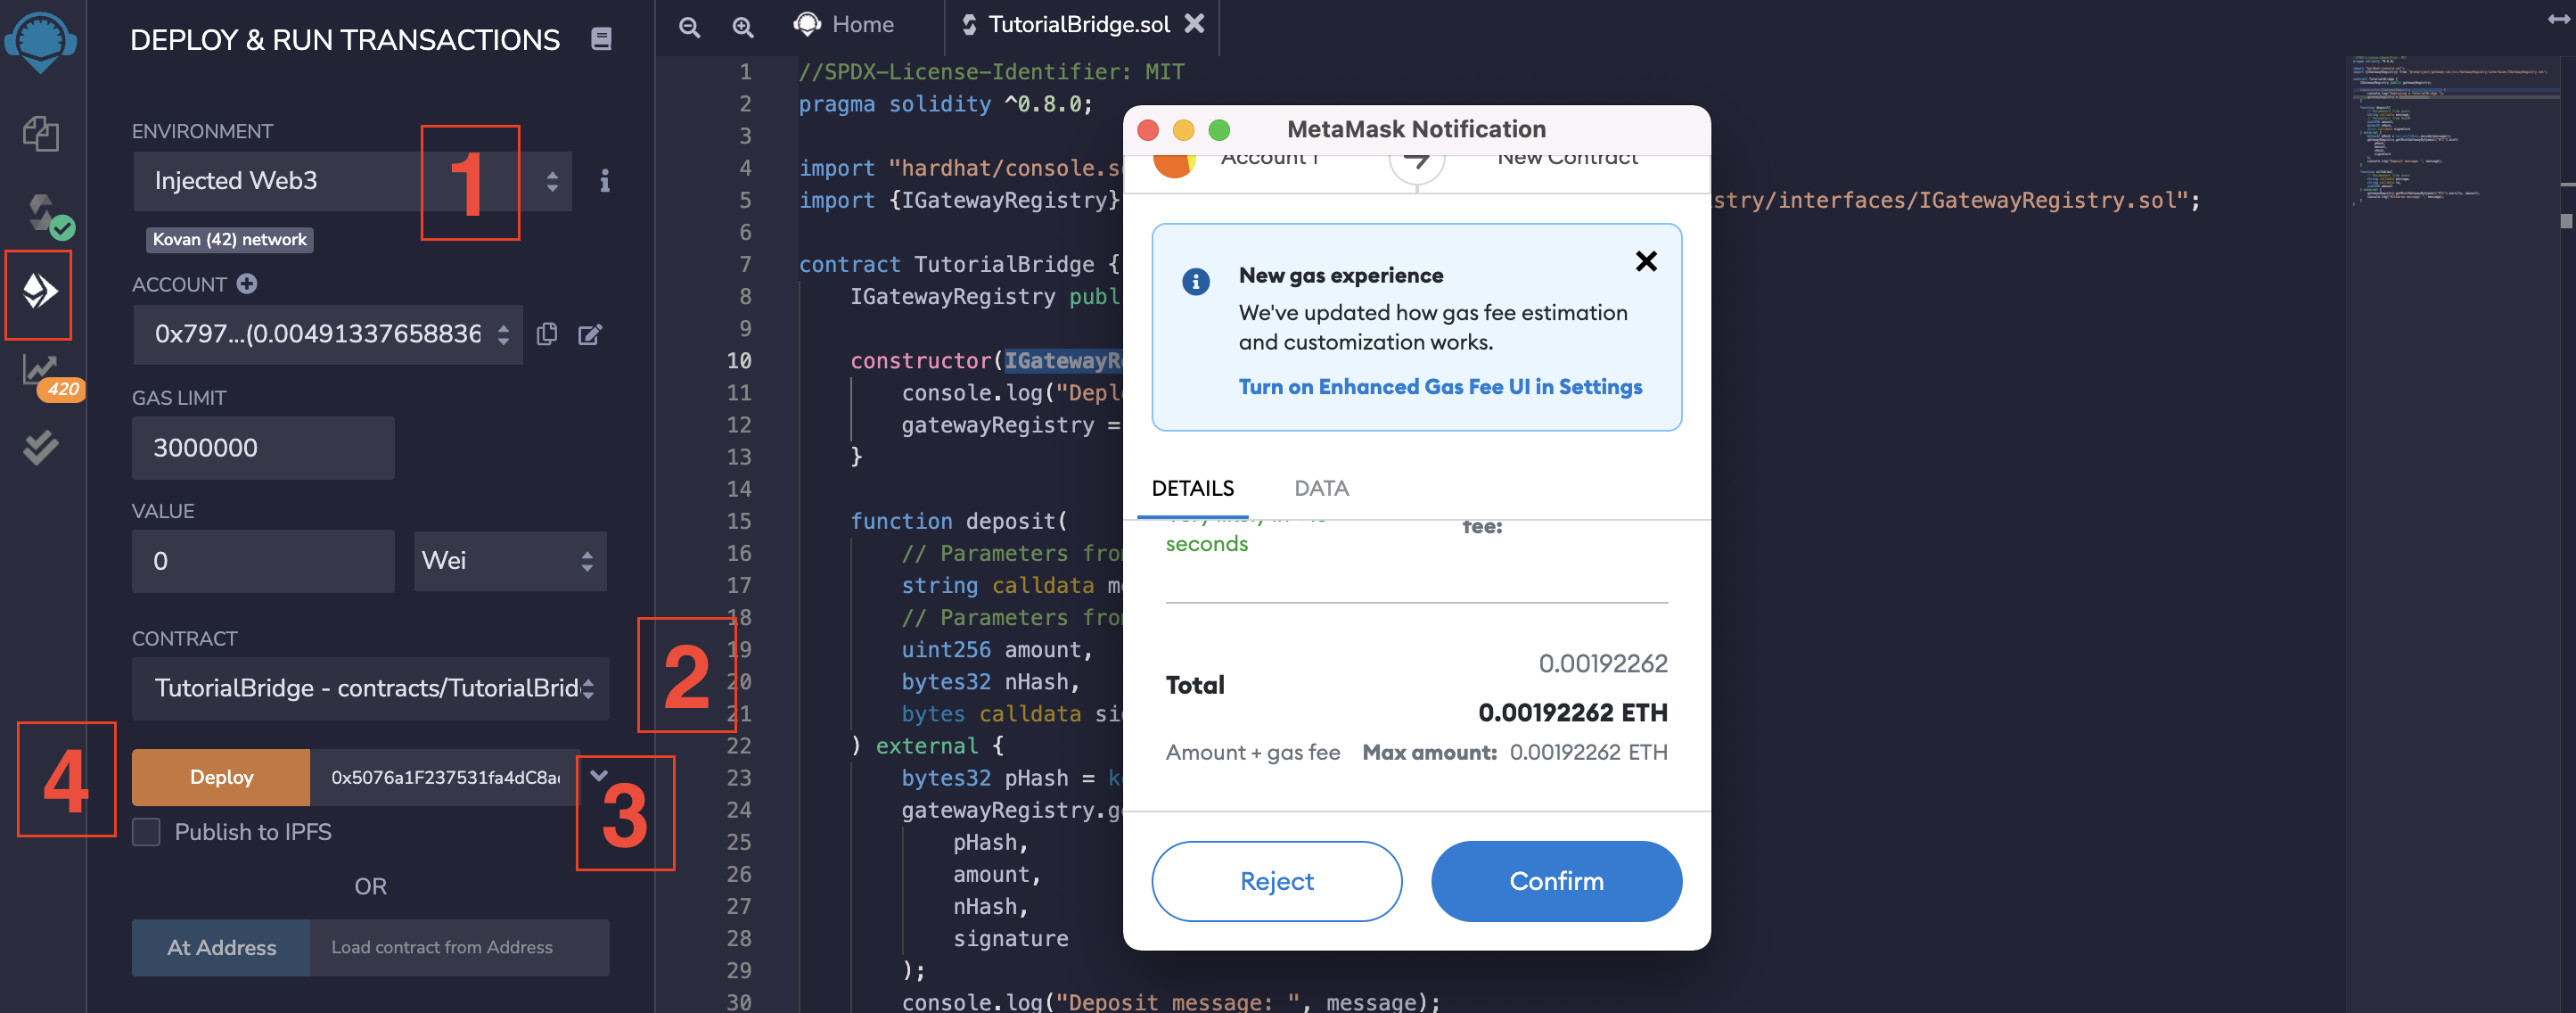
Switch to the "Deploy & Run Transactions" tab and then:
- Select "Injected Web3" as the environment,
- Select "TutorialBridge" under the contract tab,
- Enter
0x5076a1F237531fa4dC8ad99bb68024aB6e1Ff701(the testnet Gateway Registry address) into theaddress.gatewayRegistry_textinput, and - Click deploy and confirm in MetaMask.
info
You can find the GatewayRegistry address for other chains and networks on the Contract Deployments page.
tip
TODO: You can also use the TutorialBridge contract that we have deployed here: 0x2e8084cd0d6a3d7923504c3d68E849Ba7f032C6b.